Advanced Geoscripting: Software Setup#
This document describes how to install all required software for the course. Please make sure that all software is installed and working on your computer.
1. Python#
Download and install Anaconda, a package manager for Python. (You may also use virtualenv or the like if you prefer, but I recommend using Anaconda.)
1.2 Set up Python environment#
open the Anaconda prompt and execute the commands below to set up a new environment called advgeo
1. Create a new virtual Python environment.
$ conda create -n advgeo python=3.12
2. Install all required Python packages listed in the file requirements.txt. Remember to activate your environment before installing the packages.
$ conda activate advgeo
$ conda install -c conda-forge --file requirements.txt
Install pre-commit
The package pre-commit is not available in the standard anaconda channel. So you need to install it via the conda-forge channel.
$ conda install -c conda-forge pre_commit
Install scalene using pip
The package scalene is not available via any anaconda channel, so you need to install it using pip.
$ pip install scalene
1.3 Python IDEs#
An IDE (Integrated Development Environments) is basically a text editor with a lot of additional functionalities (e.g. syntax highlighting, automated code completion) which makes writing code easier and faster. During this course we will use PyCharm and Jupyter Notebooks.
PyCharm#
I recommend applying for a free student license, which lets you use the PyCharm Professional Edition for free. Compared to the PyCharm Community Edition (which is free for everyone), the Professional Edition provides a few more useful tools for scientific programming. (e.g. viewing plots)
Configure Python Environment in PyCharm
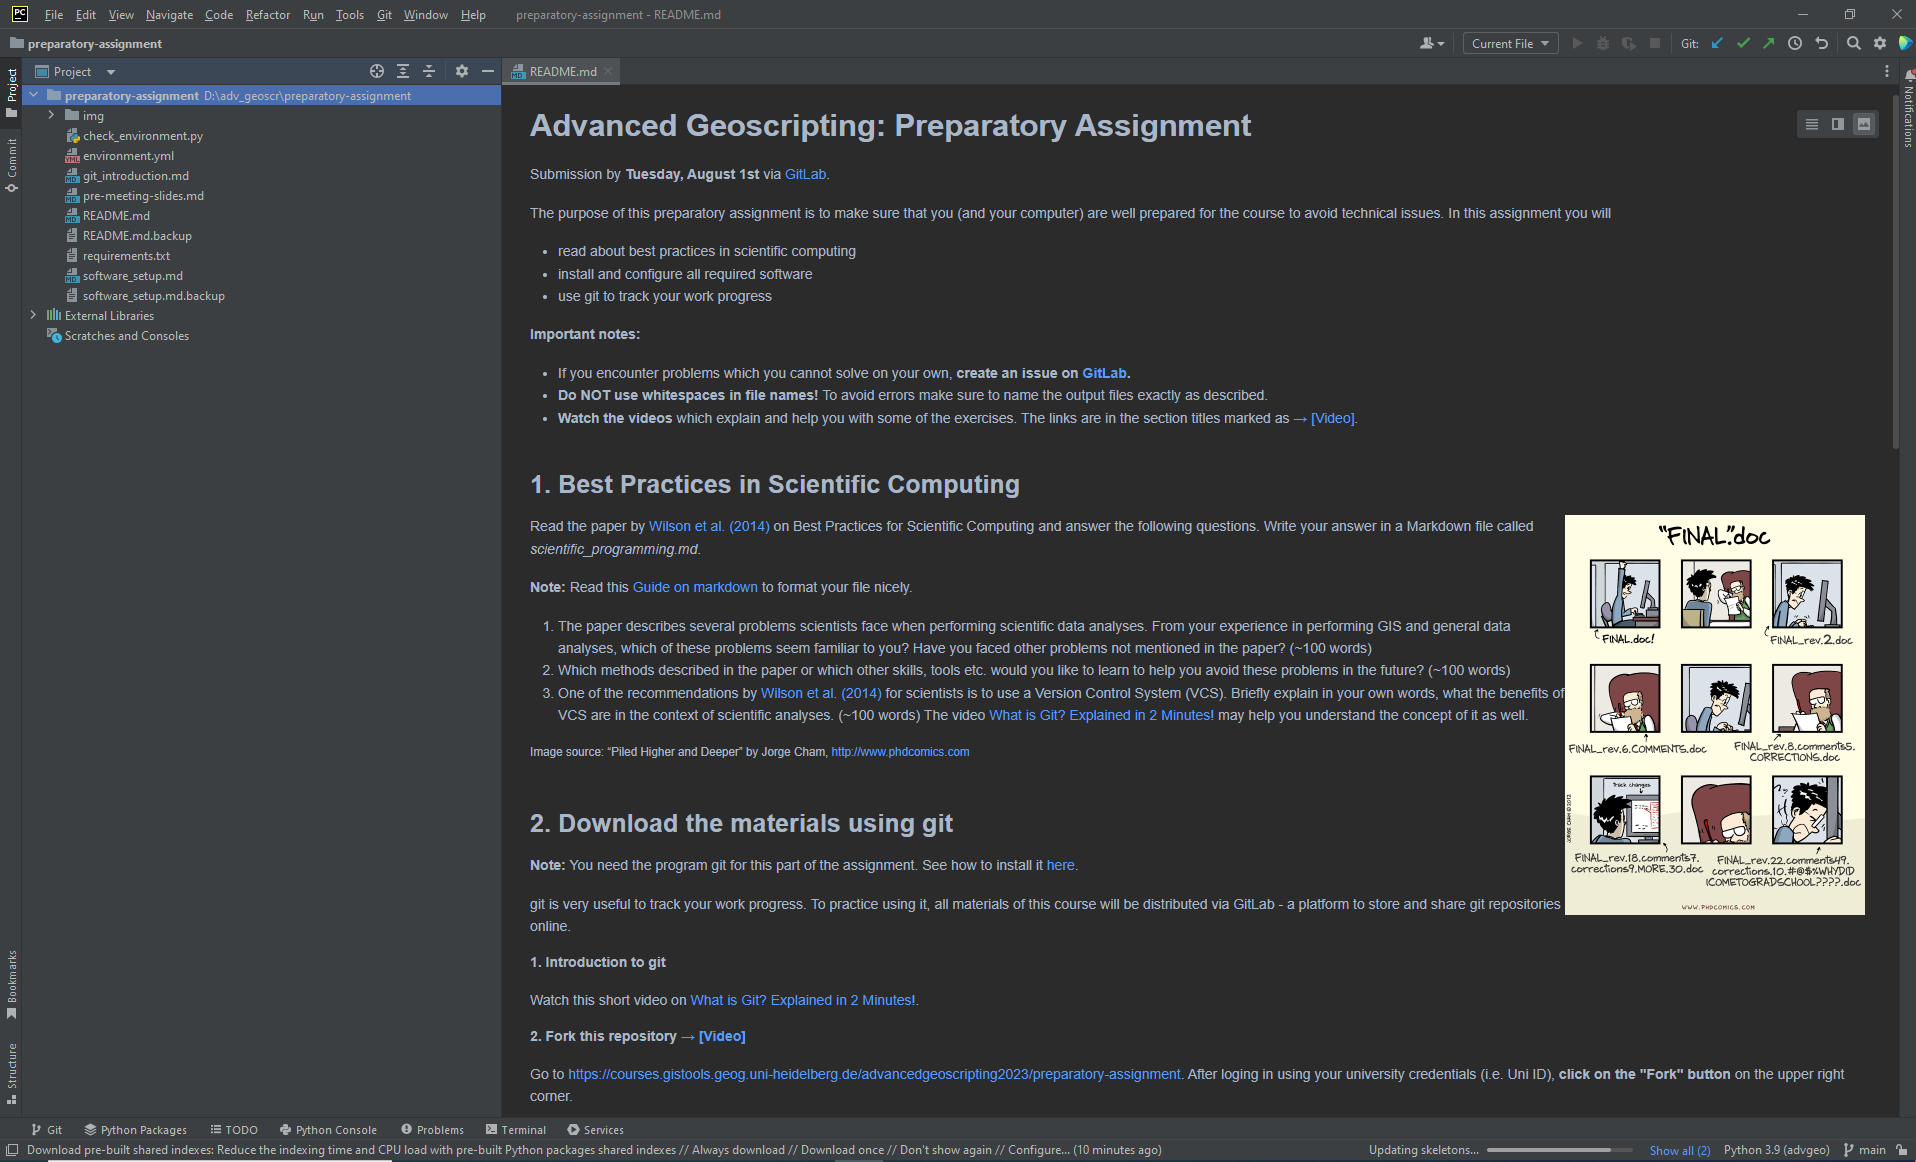
Open PyCharm and create a new, empty project or open an existing one.
Open the project preferences (File –> Settings).
Choose the advgeo environment as the Project Interpreter.
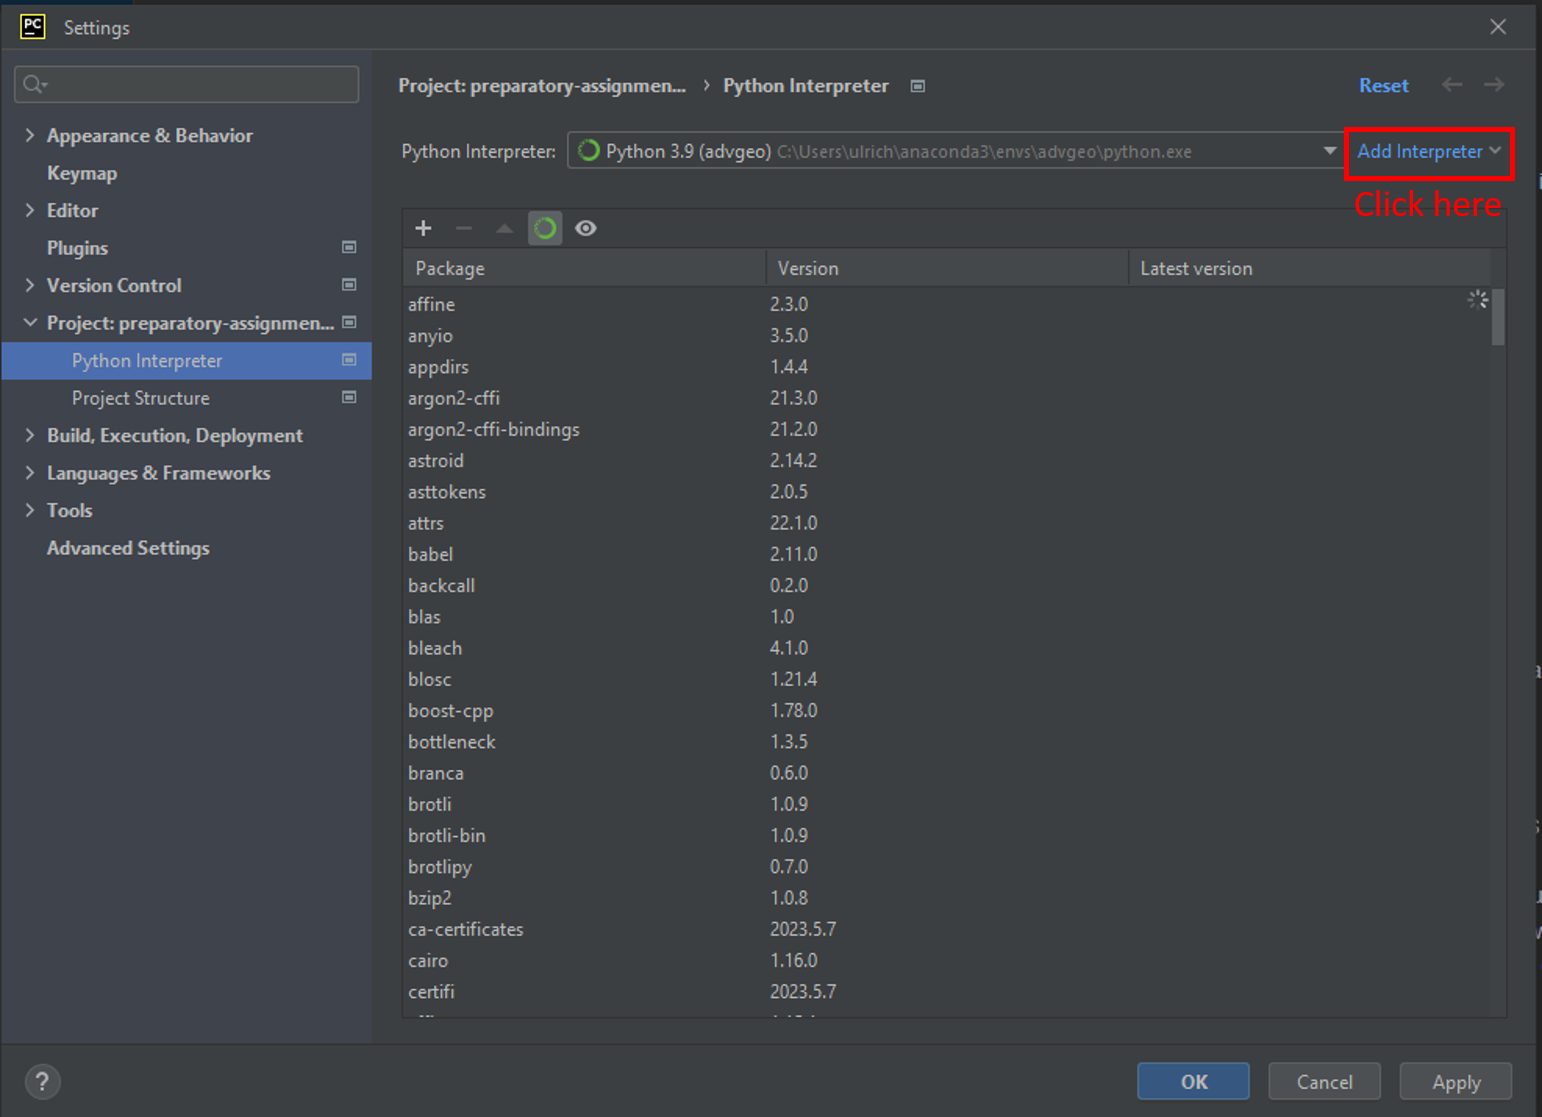
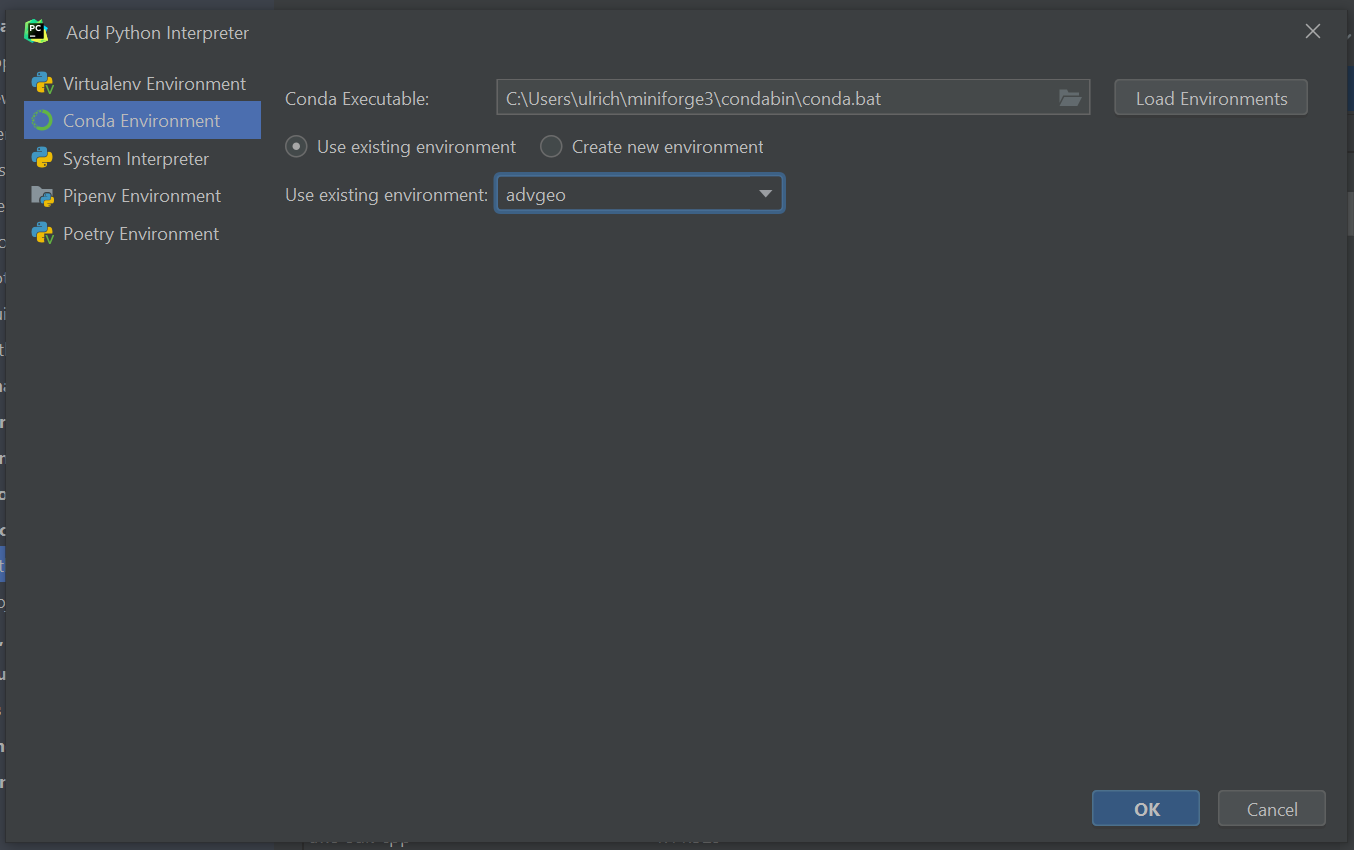
The new environment is probably not shown in the list of available environments within Pycharm. In this case, click on the button “Add Interpreter” marked in the image above and select “Add local interpreter…”. The following window should appear. Select the new anaconda environment and click “OK”.
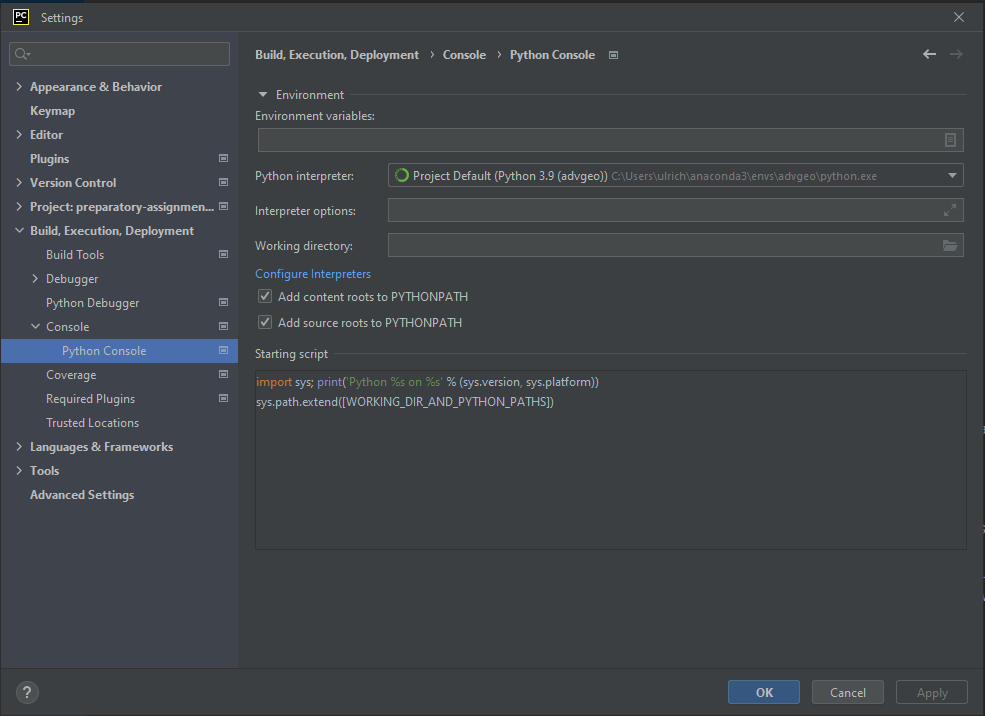
Make sure that you set the new environment also for the Python console within PyCharm.
Jupyter Notebook#
During the course we will be working with Jupyter Notebooks. In a nutshell, a Jupyter notebook is a combination of a web application and a python script. In this way, it can display Python code alongside formatted text, figures and charts. Notebooks are used frequently within scientific computing, because they are a great way of explaining what the script is doing. Watch this video for a brief introduction to jupyter notebook.
Verify installation
We’ve already installed jupyter notebook using conda above. To check whether it works, start a new jupyter notebook server by executing the following command within the Anaconda prompt and inside your advgeo environment.
$ conda activate advgeo
$ jupyter notebook
A new browser window will open. If you started the jupyter server from within the folder of the preparatory assignment, then it will look like this.
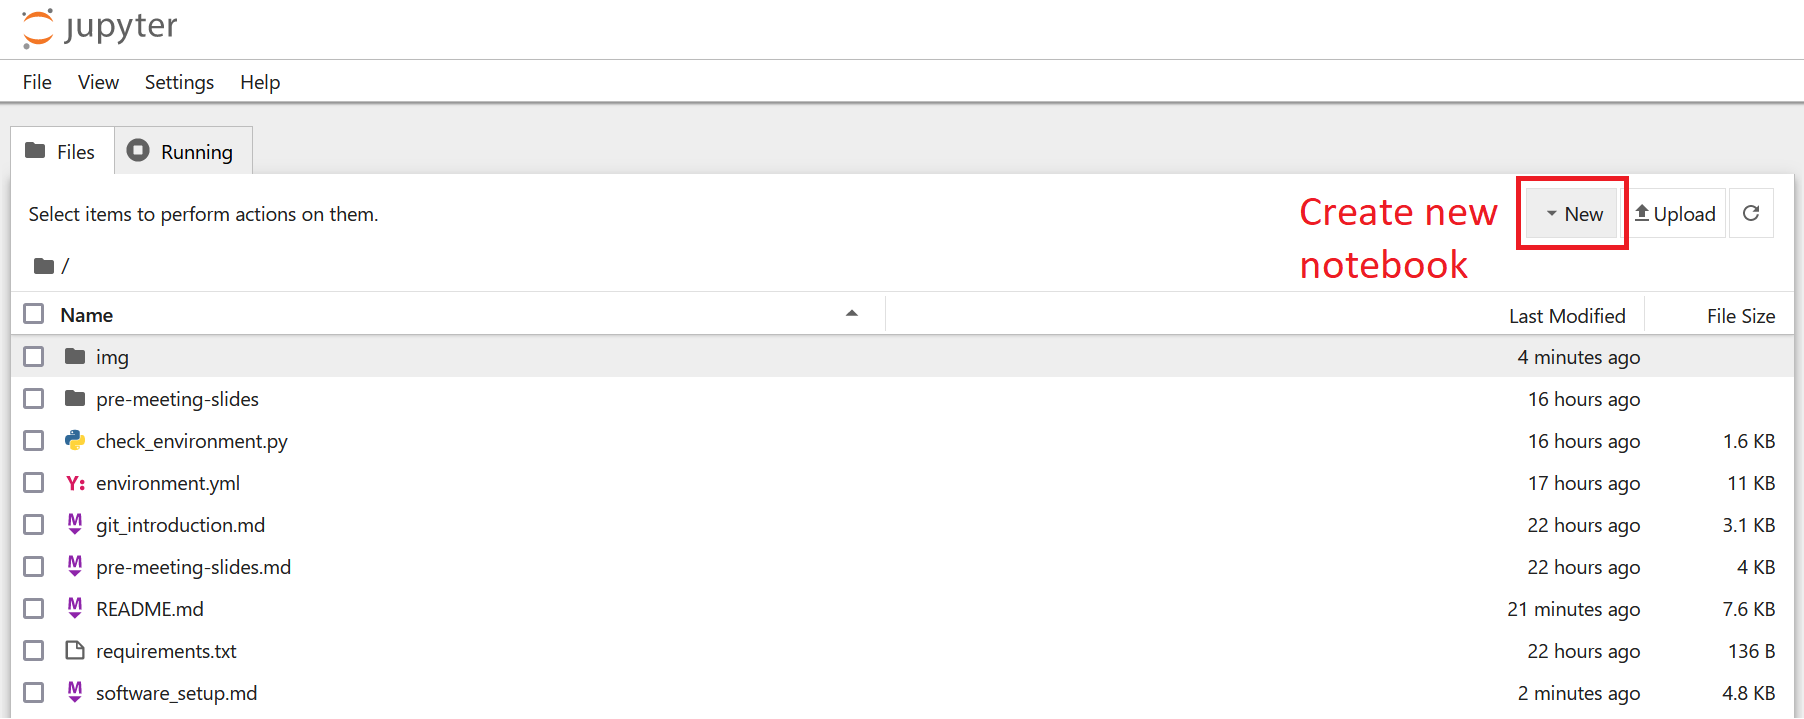
If you get a command not found message, make sure that the correct Python environment is activated.
To create a new jupyter notebook, click on the drop down menu New (top right) and create a new Jupyter Notebook by clicking on Python 3.
If you get an error message Internal Server Error when trying to create a new Jupyter notebook, make sure that you have the latest version of nbconvert by executing the following command within the Anaconda prompt and inside your advgeo environment:
$ conda update nbconvert
git: version control system#
git is a version control system which lets you track the changes you or others have made to the files of your project. If you are on Mac OS or Linux, git should already be preinstalled.
git for Windows#
If you are on Windows, install git for Windows. Please follow this video tutorial in order to choose the right settings during installation.